After breaking down the front axle and accessing the damage we settled on the repair decisions. This was the perfect time to perform parts upgrades. When we had the rear axle upgraded by Redemption Offroad and the gear ratio changed, we did not upgrade the front axle. There were money concerns which prevented that upgrade. We knew there was a good possibility of the front axle breaking by not upgrading and it finally did.
Installing The Limited Slip Differential
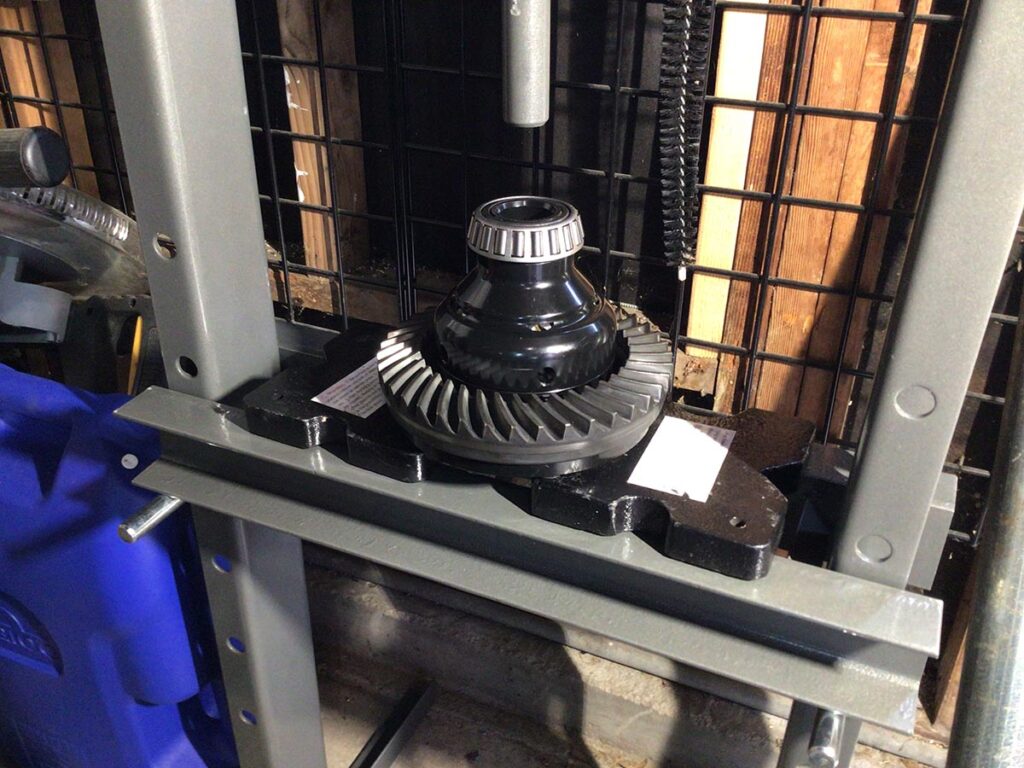
First we had to clean all of the metal shards that littered the inside of the differential. Next we had to remove the Yukon ring gear from the old carrier and reinstall it on the new PowerTrax Grip Pro LSD. I then made a pair of SETUP bearings for adjusting the backlash of the ring gear on the new LSD. This was done by purchasing the bearings at Autozone and using a dremel tool I carefully ground the inside until they would slide onto the new LSD. This allowed me to install the LSD and shim it until the correct backlash was set. Once the backlash was set I removed the LSD and using a press, installed the permanent Yukon bearings onto the LSD. Now the LSD was ready for final installation.
Installing The Axle Shafts
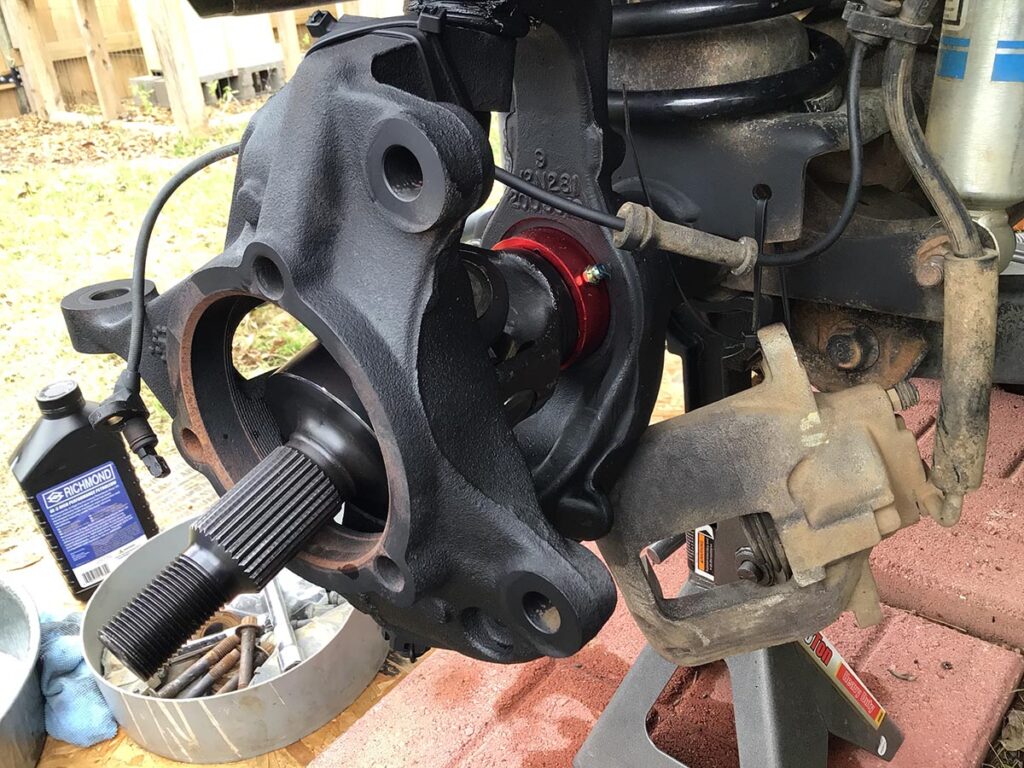
Next came the install of the Ten Factory Chromoly Axle Shafts. This was very easy. It really only involved oiling the shaft and carefully sliding it through the axle until the splines set into the grooves of the LSD. Be sure to determine the groove count on both ends and the lengths of each axle before purchasing. We also took the opportunity to install Axle Shaft Seals to prevent water and mud from entering the axle shaft.
Final Steps To Completion
The rest of the rebuild was easy. Installed the hub assembly, brakes, wheels, differential cover, and tie rod. We finalized the rebuild by filling the differential with 90W gear oil. For testing I put it into 4WD and slowly drove it a short distance. I had to be easy on it because the rear axle still had to be repaired. Soon after we had the Jeep hauled to Redemption Offroad for the rear axle repairs. It was under warranty so it was the logical course of action.
Rear Axle Repair
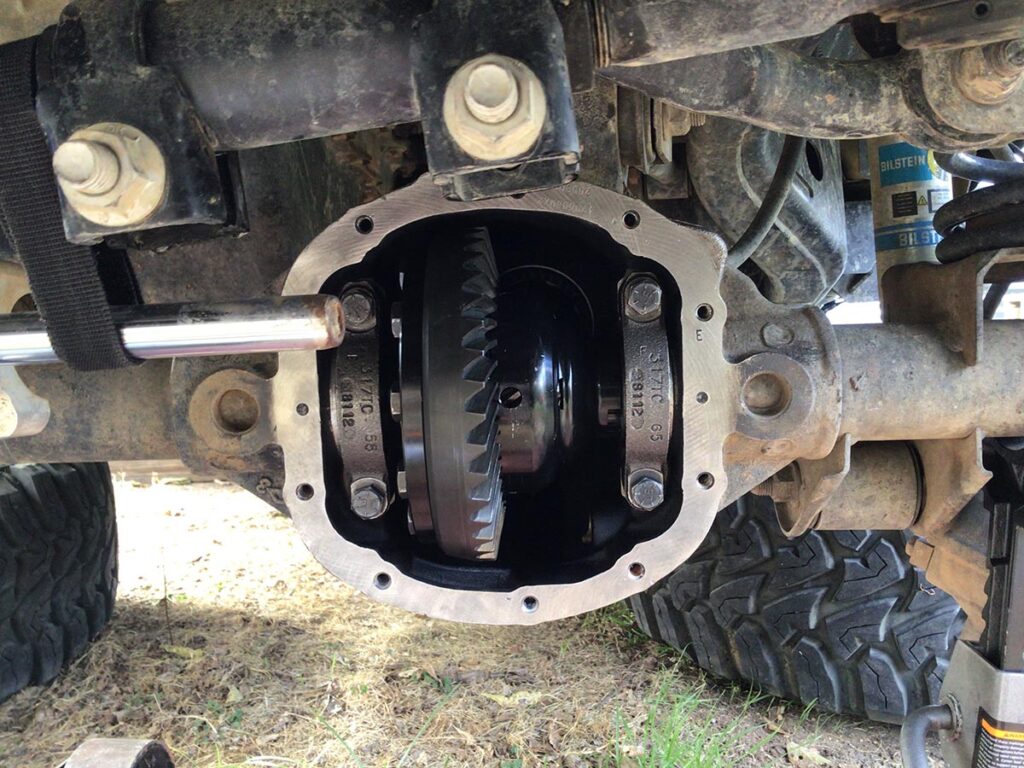
The rear axle suffered a lot of damage as well. We snapped the driver side axle shaft. Pieces of it ground up inside the differential and destroyed the E-Locker. Both the axle shaft and E-locker had to be replaced. Redemption Offroad made the repairs which got us back on the road again. The picture shows the inside of the E-locker.
Final Thoughts
This experience was quite educational. Fortunately we were somewhat close to home when we broke the Jeep. It also taught us to make sure to upgrade everything necessary when performing initial modifications. Other than the rear axle shaft, the weakest components failed. These were the parts we had not upgraded. This could have easily happened on one of our out of state off road trips which would have been a complete disaster. For now though, were ready to wheel again and are planning our next adventure. This time with the front drive train upgraded as well.